How to Make Lined Pages with Word for Amazon KDP
Hi everyone! Today I’m going to go over how to make your own lined pages using Microsoft Word for your Amazon KDP Low Content Notebooks and Journals. I don’t believe anyone should have to rely on templates and worse with Amazon cracking down on whatever they deem duplicate content, it’s even more reason to know how to make your own pages.
How to Make Lined Pages and Add Value:
- Setting Page Size and Margins
- Making the Lines for Your Template
- Duplicating Pages
- Saving Your PDF
- Adding Page Numbers
- Adding Background Image(s)
- Adding a Quote
Here’s the tutorial in video format if you prefer:
0. Save Your Files
If you aren’t already in the habit of saving your files it is a great habit to have. Make sure to save often as well.
1. Setting Page Size and Margins
For this How-to Guide, I will be making 6×9 inch pages with bleed. Also, the lines will be Medium Ruled or College Ruled paper has 9/32 in
You can see what sizes you need based on various page sizes through Amazon KDP’s Help Center.
It is important to do first as making changes later will affect various things and can be hard to fix.
Once you’ve made a new Word document click on the Layout ribbon or Tab.
Click on the Size button, then click on “More Page Sizes…”
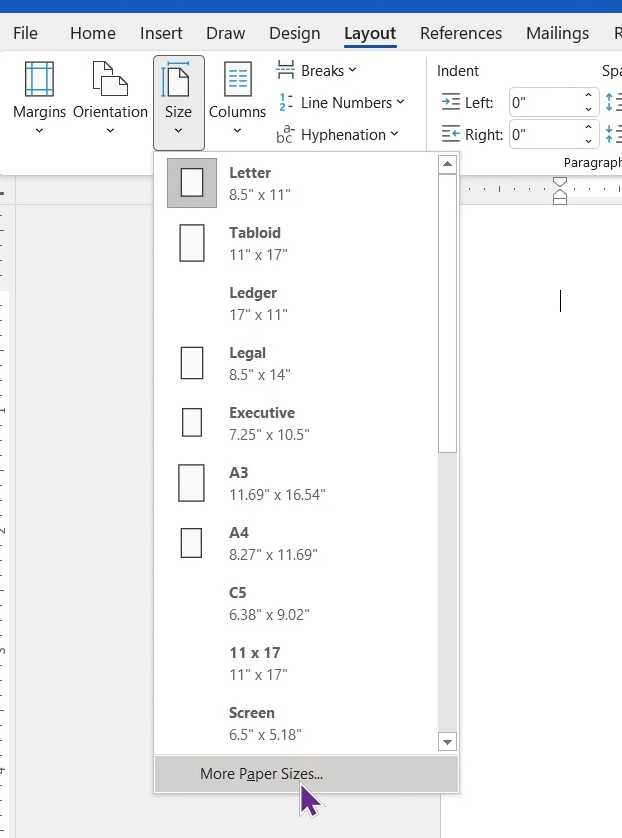
The Page Setup popup will appear with the Page tab selected.
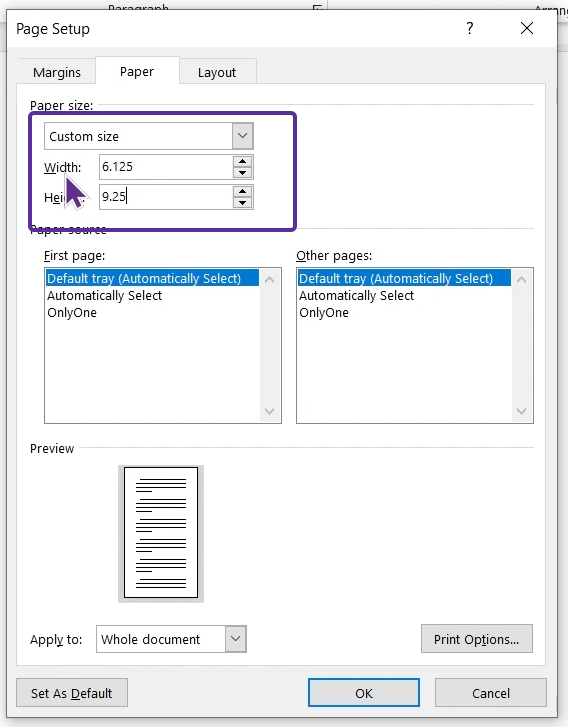
Change the Width to 6.125 inches.
Change the Height to 9.25 inches.
Next click on the Margins tab.
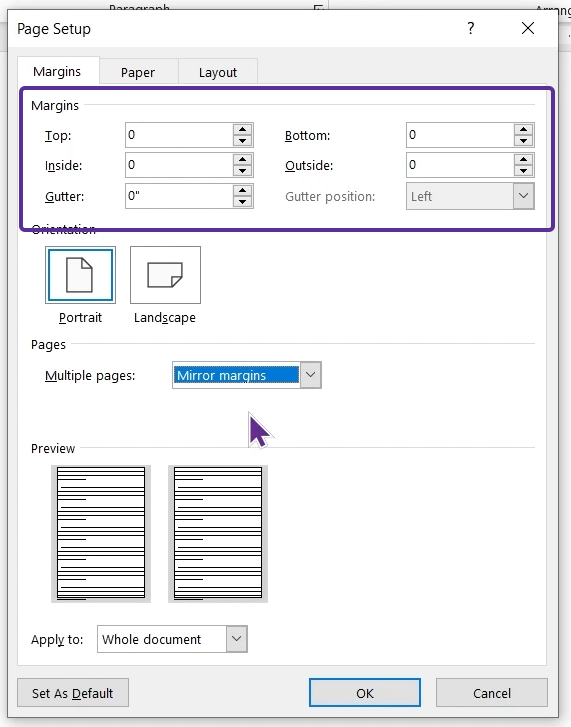
Set all the margins and gutter to 0.
It is also a good idea to change the multiple pages to “Mirror pages.” This is to build the habit as it doesn’t hurt low content templates. When making a book that as no bleed it becomes important.
Click the Okay button to set the settings.
2. Making the Lines for Your Template
The fastest way I’ve found to make a lined page template is to use tables. Click on the Insert Ribbon or Tab. Then click on the Tables button.
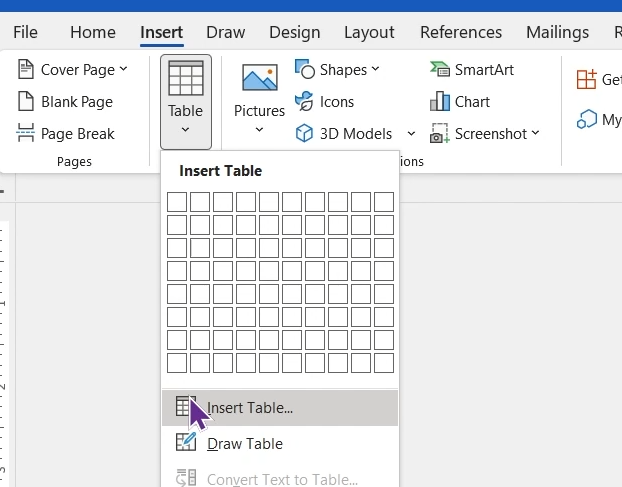
Click on “Insert Table…” to bring up the table popup.
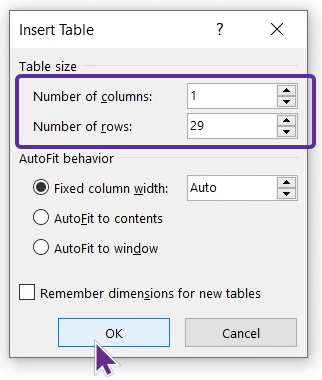
Change the Columns to 1 as we don’t need any columns.
Helpful Tip: You can add columns if you want to make graph paper or grid paper.
Change the number of rows to 29. This won’t fill the page yet, also you might need more or less if you decided to use a different page size.
Helpful Tip: (Page Size – White Space) / Line Height = Number of Lines rounded down to a whole number
Example: (9 – 1) / 0.28 = 28 (don’t forget to add 1 more for the white space)
Now that you have the table click on the crosshairs that appear in the top left corner of the table. This will select the whole table.
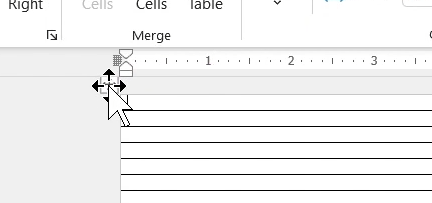
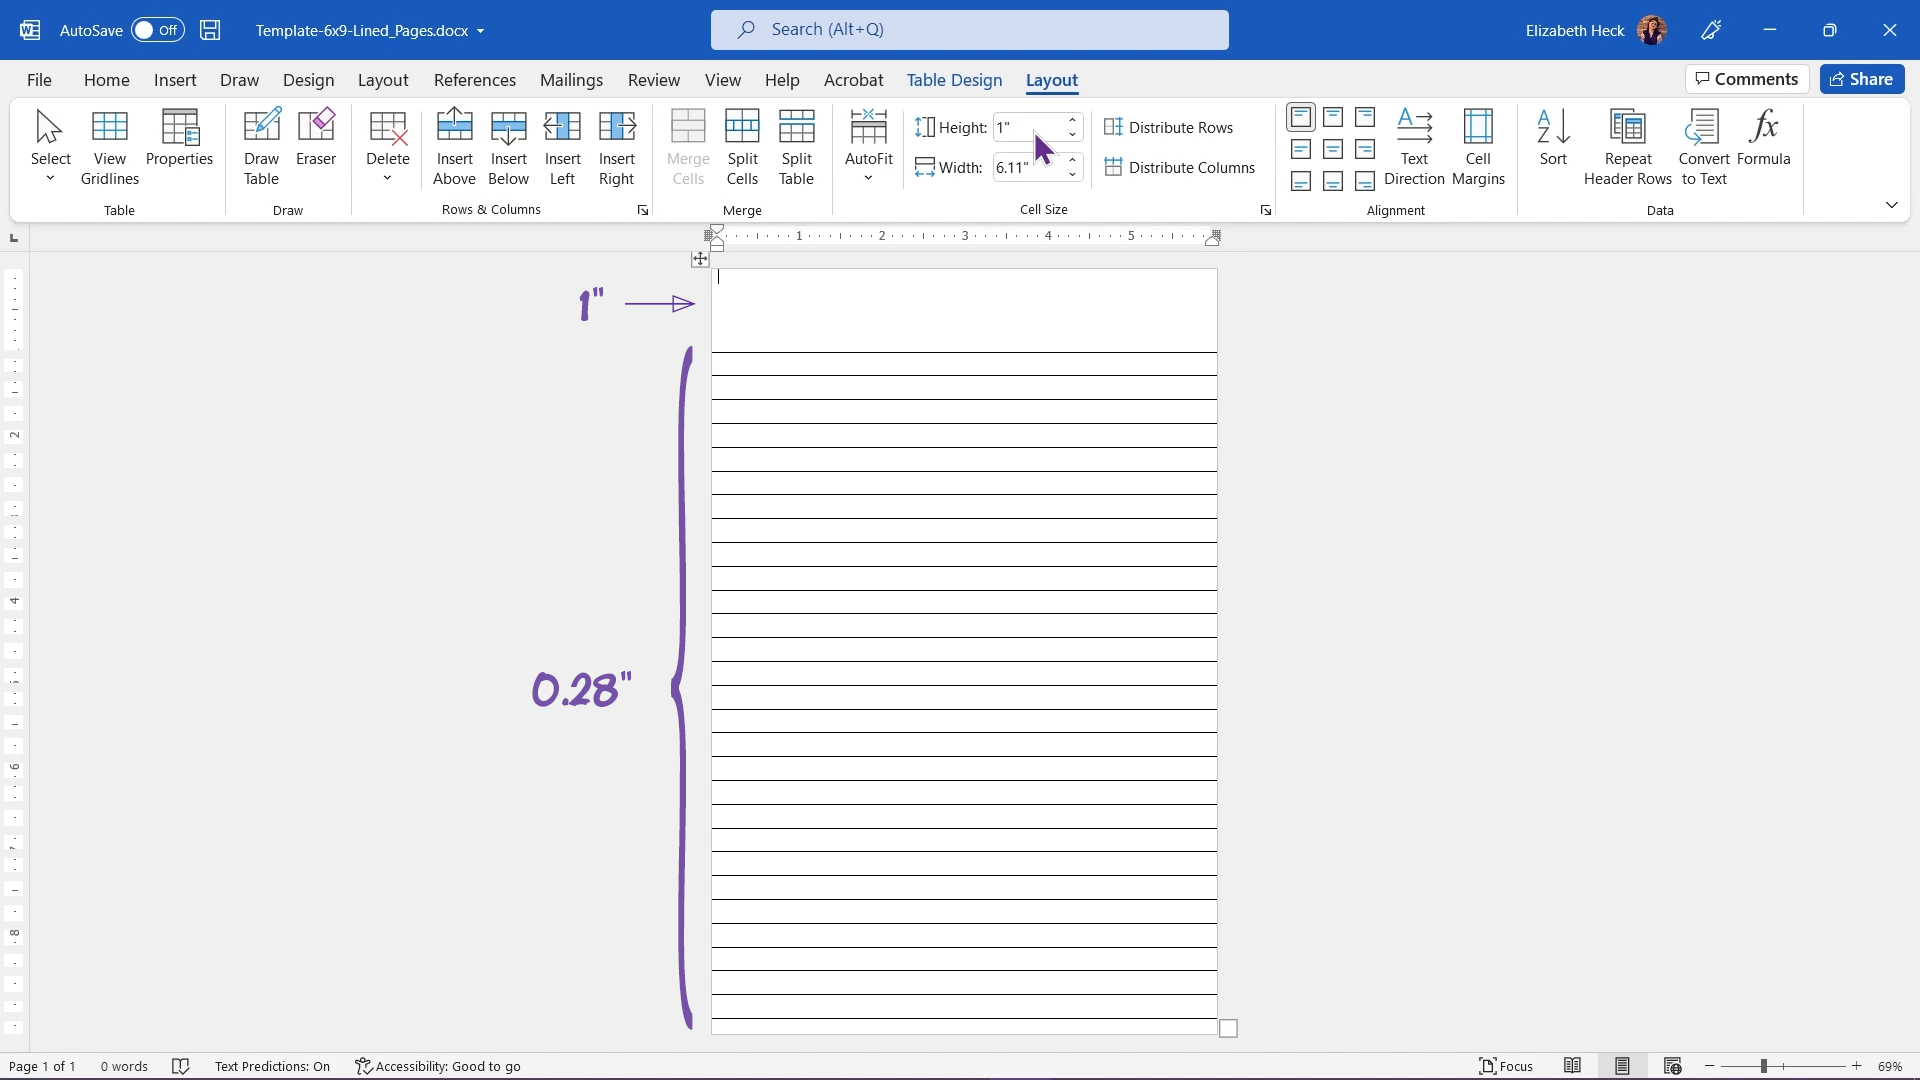
Click on the Layout Ribbon or Tab to the right of the Table Design Ribbon.
While the whole table is still selected, change the Height in the Cell Size section to 0.28 inches.
Microsoft Word Doesn’t support going past the 2nd number or hundredths so it truncated 9/32 or 0.28125 inches.
Click in the first cell or row of the table. and change the height to 1 inch.
Now don’t get too excited. By default, a table’s line color is black which can be a problem when using black pens. To address this we can quickly change the color in the Table Design Ribbon or Tab.
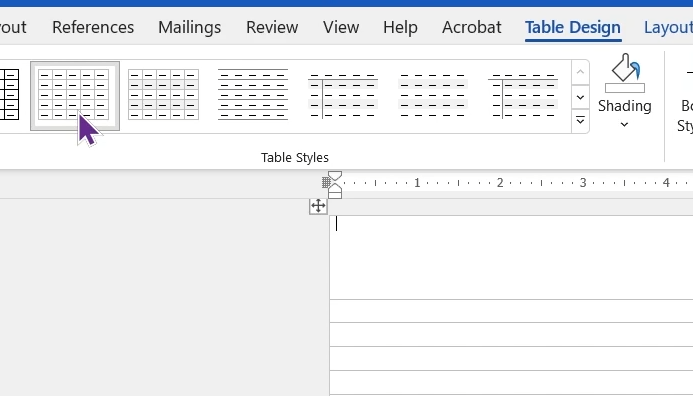
Click on the “Table Grid Light” Table Style and now your page is done.
Helpful Tip: Save this as a base or default starting point for the next steps so you don’t have to undo any of your work.
3. Duplicating Pages
Click on the crosshairs on the top left of the table and copy it (Ctrl+C or ⌘ + C)
Click on the bottom of the page outside of the table and paste (Ctrl+V or ⌘ + V) the table to make a new page.
Repeat this as many times until you have the page count you want.
4. Saving Your PDF
Now that you have your pages we need to save them to PDF. There’s a couple of ways of doing this.
Click on File in the upper left-hand corner or use (Ctrl+P or ⌘ + P) to save a step.
Quick Note: I have had issues with the “Save as Adobe PDF” option so I will go over an alternative.
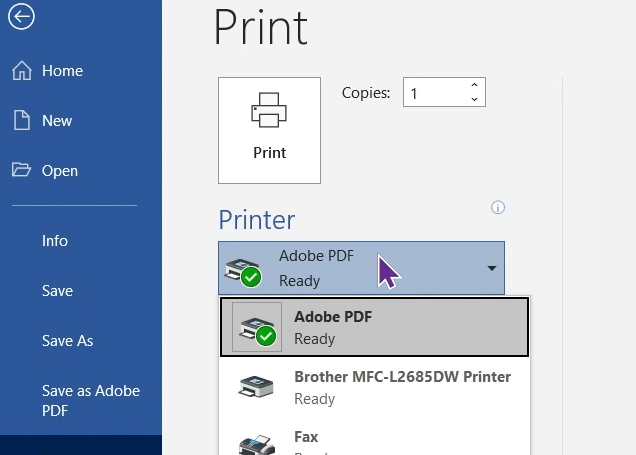
Click on the Print option if you aren’t already there.
Under Printer change the printer to Adobe PDF.
After you’ve selected Adobe PDF as your printer click on the Printer Properties. We need to make a few changes or you’ll get a page that is your default page size.
I have done this a few times so I already have a 6.125×9.25, if you’ve never done this then it will likely say Letter (maybe A4?) so let’s go over making your own.
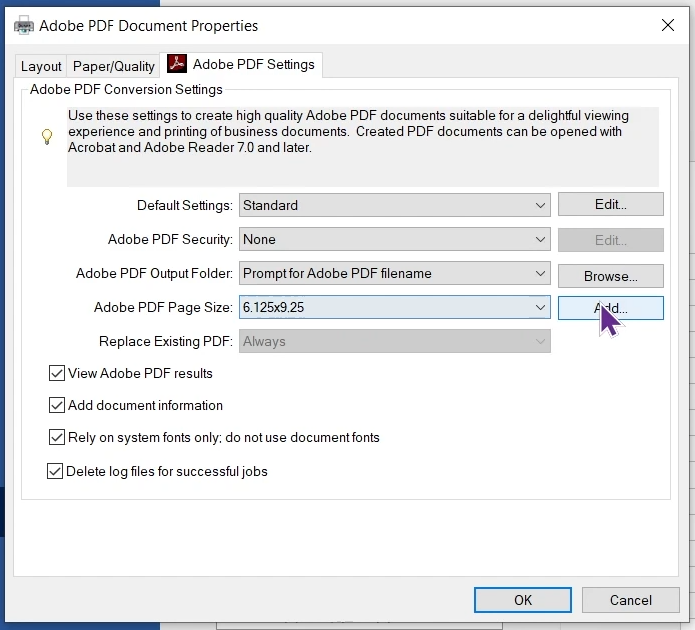
Click on the Add button to bring up the Add Custom Paper Size.
Change the Width to 6.125 which will be changed to 6.13. I haven’t had any issues with this correction when uploading manuscripts.
Change the Height to 9.25
Name your new paper size, as you can see I “creatively” named mine 6.125×9.25
Click Add/Modify to save the new size.
Now you can select your new paper size from the drop-down.
Click Okay to save the settings and now you can click the big Print button.
After a short time, you’ll be prompted with saving your PDF file name.
Congratulations, you’ve now made your first template!
5. Added Page Numbers
Hopefully, you made that base or default starting point. Otherwise, you will have to edit all of the tables on each page. We will be using the header space to contain the page numbers so they don’t take away writing space. An added benefit to this method is that the header will also create the top white space.
Make sure you are in the Table Layout Ribbon.
Click in the first cell and change the height from 1 inch to 0.28 inches.
You will have to delete some rows. The amount can vary depending on your page size.
If you’re using the 6.125 x 9.25 we started with then you will delete 1 row.
In the Insert Ribbon, you’re going to go over to Page Number click to reveal the dropdown.
In the Page Number menu, you will then click Plain Number 3.

Feel Free to play around with the options later, for now, we’ll move on using “Plain Number 3” as it puts the number in the common spot for the first or odd pages.
We need to address a few things before we move on as you have noticed some issues.
Once you’ve clicked on the “Plain Number 3” you’ll find yourself in the Header & Footer Ribbon.
The default header and footer sizes are 0.5 inches.
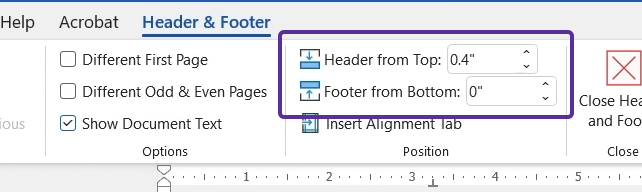
Change the footer to 0″ as we won’t be using a footer.
Change the header to 0.4″ that small change is enough to ensure you have the white space at the top of the page remains and we’re back to having 1 page.
The last issue that you’ll have remaining is that the number is too close to the edge. While still in the Header & Footer you’ll want to click on the Layout Ribbon.

You’ll want to adjust the Indent. While you really only need to worry about the Right I’ve found it is a good habit to build to go ahead and set both just in case.
Set the Left and Right Indent to 0.4″ to give plenty of room to stay inside the text safe zone. I have found the numbers Amazon suggests for the safe zone can be a bit too close. That is why I use 0.4″ and why I don’t use the 0.375″ Amazon Recommends.
Now the traditional way to have page numbers is on the outside of the pages.
Before we fix this exit the Header & Footer section for a moment.
5.1 Make a Second Page
Click on the big red X button that says “Close Header and Footer” or double-click on the body of the page.
Highlight the whole table, copy it, go to the bottom of the page, hit Ctrl + Enter/Return (or ⌘ + Enter/Return) or on the Insert Ribbon click the Page Break button to get to a new page, and paste the table.
Now we return to fixing the Even/Left page numbers.
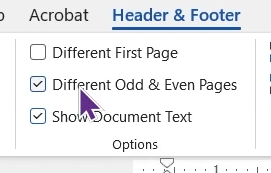
Now that we have a second page double-click the header section or on the Insert Ribbon click on the Header drop-down and select Edit Header.
Click on Different Odd & Even Pages to achieve this.
On the second page header, click on the Home Ribbon and set the Paragraph Alignment to Left.
Just in case: If for any reason the second page doesn’t have a header this is an easy fix. Click on the second page and insert a page number just like you did earlier with 1 important difference. This time choose “Plain Number 1.”
The rest is the same as the first time around. Duplicate your pages and save the PDF.
6. Adding Background Image(s)
This is in my opinion (inner child and all) one of the best ways to add value to a simple journal or notebook. It also isn’t very hard to do.
Quick Note: Make sure you have whatever license or copyright you need to use the image.
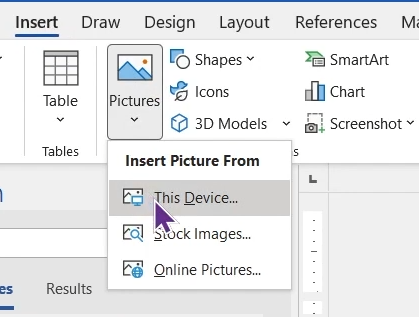
Click on the Insert Ribbon.
Click on the Pictures dropdown and select “This Device…”
Find your image and select it to place it. You might have noticed an issue with the image. This is a quick fix.
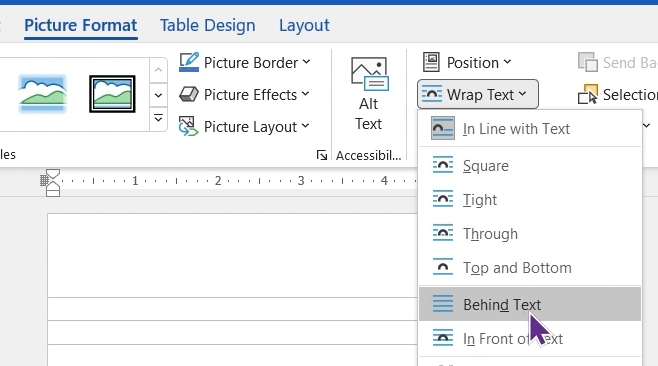
With the image selected click the Picture Format Ribbon.
Click on the Wrap Text drop-down and set it to Behind Text.
Now that you have the image behind the lines you can adjust the size and position with the picture handles.
Unless you are going to make the pages in color it is best to make the image grayscale. Best of all we can do all of this inside of Microsoft Word!
In the Picture Format Ribbon click on the Color drop-down button.

Select 0% Saturation to turn the image to grayscale.
If your image has any dark colors I recommend playing with the transparency next.
Click on the Transparency drop-down which is also in the Picture Format Ribbon.
![]()
Play around with this. I have found that Transparency at 80% is a good option to try. Keep in mind that the lighter elements of your picture might get lost.
One last tip for this step: You can have different images for each page or have a set of images that repeat.
Once you’re happy with the results you’ll copy and paste the table and image just like before to make all of your pages.
7. Adding Quotes
This is great if you’re making inspirational or motivational journals/notebooks.
A Quick Note: if you use actual quotes make sure the person has been dead for 70+ years or you have permission to use the quote before you try using it or you could end up with legal issues.
Since we’re using a table for our lines we can place the quote in the top cell.
While inside the table you’ll be able to click on the Layout Ribbon next to the Table Design Ribbon.
Click on the Cell Margins button to bring up the Table Options menu.
Set left and right margins to 0.08″ that should leave enough room on the sides to be within the text safe space.

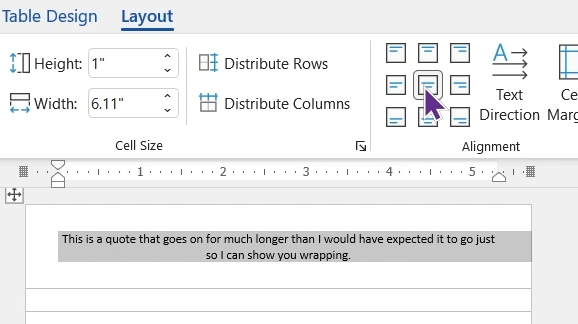
The missing part is the top. I will warn you playing with the Top Margin in the Table Options will affect all of the cells.
Instead, I recommend using either the Middle or Bottom vertical alignment options.
As long as the quote/message isn’t too long that should be all you need to do. Oh, feel free to play around with the fonts but keep in mind to make sure you can use the font without any special licenses.
Each page can have a unique quote/message if you like. I think you know what’s next at this point, copy and paste the table like earlier to make the new pages.
That wraps up this tutorial. I hope it helps you come up with several ideas of how you could increase the value for your no-content or low-content journals/notebooks. As always I’d love to hear from you if you found this useful or have any comments or questions. Leave a comment below and I’ll get back to you as quickly as possible.
Share your thoughts!